Much of
art is about the process. Sometimes you already know the process you
will use for a project. Sometimes you have to invent one to
accomplish your goal. This was one of those projects. I wanted to
create a reproduction of a William Morris tapestry from the early
1900's. I have always loved this style of design, and planned to
display it in my own living room.
I
started with a large panel, painting it a muddy purple color. After
measuring out exactly where my tapestry would be placed, I taped off
and applied Proceed Smooth Absorbent Texture and dragged a wallpaper
brush through it vertically and horizontally to create the texture.
The
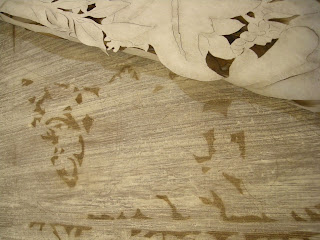
trouble was how to transfer the design. There are a lot of ways to do
this, but the rough surface complicated things. My solution was to
cut a stencil of the darkest dark throughout the whole design. I used
a product called QST for my stencil, which is similar to interfacing
material available from fabric stores. It can be cut with either an
xacto or a stencil burner, which will remove a slight amount of
material. Perfect for the fine lines I wanted.
When it
was finished I aligned the design and used my airbrush to apply raw
umber paint through the stencil to the tapestry surface. Once that
was accomplished, I painted the various elements using a limited
palette of Yellow Ochre, Oxide Green, Red Oxide and Raw Umber, all in
Proceed Slow Drying Acrylics. These are paints that were formulated
to have open time, which allows one the ability to move the paint and
pull off some paint before it dries. That was very useful in
revealing the texture as needed. The panel was sewn at top and bottom
to accommodate rods for hanging and stabilization.
This was an unusual project, and though it was laborious, I have enjoyed the results for a number of years. I hope you enjoyed seeing my process for it, and can use some of the information included for your own projects. Happy painting!


